.png)
GIR Pattern
- Mar 12, 2021
- 4 min read
Updated: Jul 11, 2025
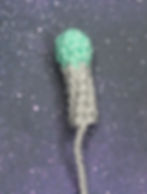
Happy free pattern Friday my friends! Since we did GIR in his dogsuit not too long ago, I thought it would only be fitting if we made GIR without his dog costume!
This plushie is a bit bigger than the GIR in Dogsuit plush than we made previously, but that just means there's more to cuddle! This pattern is made with a lot of smaller pieces that make complex shapes, so it does require quite a bit of pinning and patience, but I think the end result is totally worth it!
So, without further ado, let's grab our yarn and our hooks and jump into this week's very fun pattern!

This pattern and photos are ©CutiepieCrochet for personal use only. You may not copy, sell, or alter this pattern in any way. You may sell items made from this pattern, but please credit me as the designer.
I would LOVE to see your finished projects! Tag me on Instagram (@cutiepie_crochet)!
Materials:
3.75mm crochet hook
Worsted weight yarn in grey and aqua
Fiber fill
Stitch markers
Yarn needle
Scissors
Embroidery thread
Pins
Abbreviations:
mr- magic ring
st- stitch
sc- single crochet
inc- increase
dec- decrease
ss- slip stitch

Head:
In grey
Round 1: mr 6 [6]
Round 2: inc x6 [12]
Round 3: (sc 1, inc)x6 [18]
Round 4: (sc 2, inc)x6 [24]
Round 5: (sc 3, inc)x6 [30]
Round 6: (sc 4, inc)x6 [36]
Round 7: (sc 5, inc)x6 [42]
Round 8: (sc 6, inc)x6 [48]
Round 9: (sc 7, inc)x6 [54]
Round 10: sc around in back loops only
Rounds 11-25: sc around [54]
Round 26: (sc 7, dec)x6 [48]
Rounds 27-28: sc around [48]
Round 29: (sc 6, dec)x6 [42]
Round 30: sc around
Round 31: (sc 5, dec)x6 [36]
Round 32: (sc 4, dec)x6 [30]
Round 33: (sc 3, dec)x6 [24]
Round 34: (sc 2, dec)x6 [18]
Round 35: (sc 1, dec)x6 [12]
Tie off, hide string.
Antenna:
Starting in aqua color:
Round 1: mr 6 [6]
Round 2: (sc 2, inc)x2 [8]
Round 3: sc around [8]
Round 4: (sc 2, dec)x2 [6]
Switch to grey
Rounds 5-10: sc around
Tie off, leaving a long tail for sewing.
Eyes (make two):

Starting in aqua color:
Round 1: mr 6 [6]
Round 2: inc x6 [12]
Round 3: (sc 1, inc) [18]
Round 4: sc 1, inc (sc 2, inc)x5, sc 1 [24]
Round 5: (sc 3, inc)x6 [30]
Switch to grey:
Round 6: sc around in the back loops only
Round 7: (sc 8, dec)x3 [27]
Round 8: sc around
Round 9: (sc 7, dec)x3 [24]
Round 10: sc around [24]
Tie off, leaving a long tail for sewing.
Body:
In grey
Round 1: mr 6 [6]
Round 2: inc x6 [12]
Round 3: (sc 1, inc)x6 [18]
Round 4: (sc 2, inc)x6 [24]
Round 5: (sc 3, inc)x6 [30]
Rounds 6-11: sc around [30]
Round 12: (sc 3, dec)x6 [24]
Rounds 13-15: sc around
Round 16: (sc 2, dec)x6 [18]
Round 17: (sc 1, dec)x6 [12]
Rounds 18-19: sc around [12]
Tie off, leaving a long tail for sewing.
Make sure the neck (rounds18-19) is stuffed firmly or it will not be able to support the weight of the head.
Legs (make two):

In grey
Round 1: mr 6 [6]
Round 2: inc x6 [12]
Round 3: (sc 1, inc)x6 [18]
Round 4: sc around in back loops only [18]
Rounds 5-8: sc around [18]
Round 9: (sc 4, dec)x3 [15]
Round 10: sc around [15]
Round 11: (sc 3, dec)x3 [12]
Round 12: (sc 2, dec)x3 [9]
Round 13: sc around [9]
Tie off, leave a long tail for sewing.
Arms (make two):
Starting in aqua:
Round 1: mr 6 [6]
Round 2: (sc 2, inc)x2 [8]
Round 3: sc around [8]
Round 4: (sc 2, dec)x2 [6]
Switch to grey.
Rounds 5-12: sc around [6]
Tie off, stuff firmly.
Shoulder Joint:
In aqua
Round 1: mr 6 [6]
Round 2: inc x6 [12]
Rounds 3-4: sc around [12]
Round 5: dec x6 [6]
Tie off, leaving a long tail for sewing.
Hand (worked in a flat piece):
In grey
ch 4
Row 1: starting in second ch from hook, sc across [3]
Row 2: ch 1, sc across [3]
Row 3: ch 1, dec 1, sc 1 [2]
Row 4: ch 1, sc across
Tie off, leave a long tail for sewing, weave in the beginning thread.


Stomach Patch:

In aqua
Ch7
Row 1: start in 2nd ch from hook, sc across
Rows 2-5: ch 1, sc across
Tie off, leave a long tail for sewing.
Now it's time for assembly! First, attach antennae to to of head, then add the eyes. Attach the head to the body, sewing through the front loops of the last row of both pieces, while you're sewing these pieces together, you'll want to stuff the neck firmly or GIR's head will be very floppy. After that, assemble the arms and attach them to the sides of the body. Add the legs to the bottom of the body; you could do sitting or standing, I obviously chose for him to be sitting, but standing is also super cute. Lastly attach the stomach patch to the middle of the body.


After all that assembly, just go ahead and embroider on a mouth and you are all finished!
Now you have your very own robot to help you conquer the Earth and hopefully impress the Tall Ones! Watch out though, Dib may very well be lurking around to try and foil your plans!
I really hope you all enjoyed this pattern today, thank you for sticking around until the end of this post! And I can't wait to show you what I have planned for next Friday!


I would LOVE to see your finished projects! Either tag me on Instagram (@cutiepie_crochet) or send me an email (crochet_things@yahoo.com)! And if you loved this pattern, consider pinning it to Pinterest, that'll really help more people to enjoy these patterns! (:
If you enjoyed this pattern and can spare a dollar or two, please consider donating to my Ko-Fi! Your donations help pay for blog fees and help me keep making free patterns!