Little Monkey Amigurumi Pattern
- Cutiepie_Crochet
- Aug 8, 2025
- 6 min read
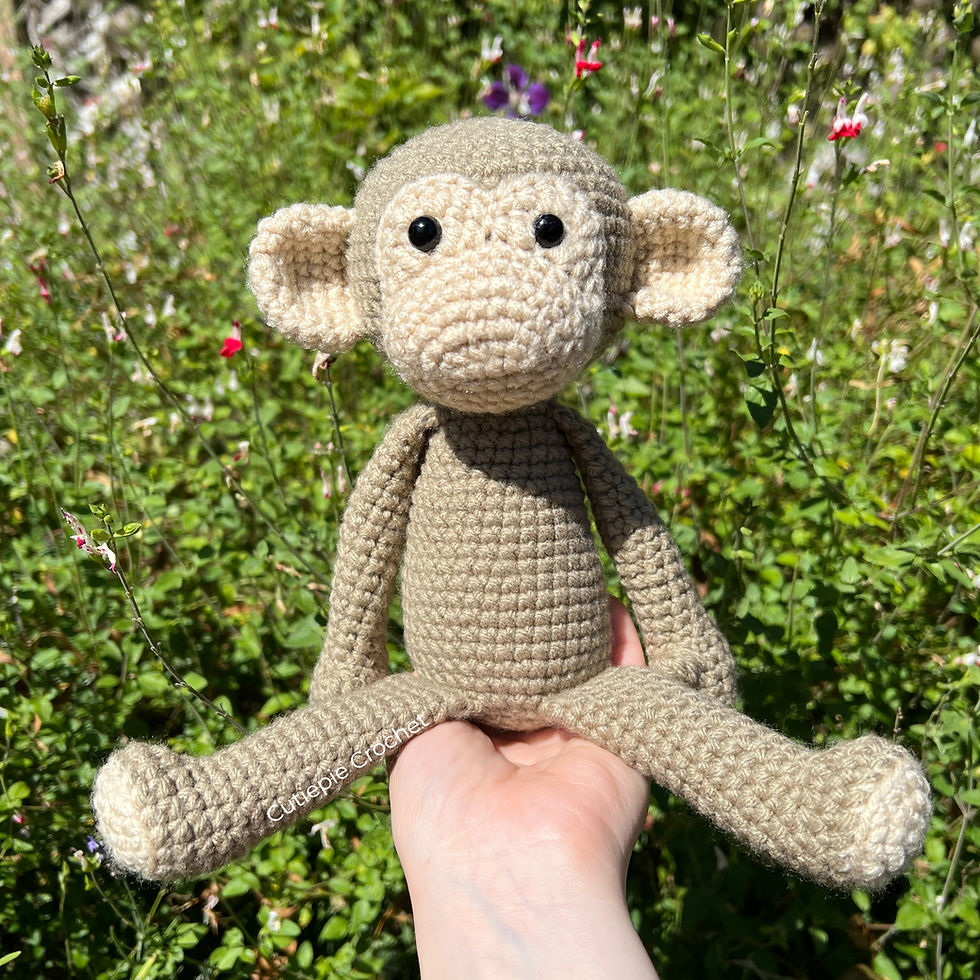
Hi crochet friends! I'm so excited to share today's pattern with you! It was finally time for the Little Monkey Amigurumi Pattern to get a low-sew version. Now, instead of having to sew ten separate pieces, it's just four pieces!
***You can purchase an INEXPENSIVE AD-FREE PDF of this pattern on Etsy! The pattern is concise, downloadable, and printable and your purchase helps me to continue putting out free patterns!***
This pattern is pretty beginner-friendly and works up surprisingly quickly to make a 7 inch tall plush, but the size can change based on the yarn you use and the tension you have when you crochet!
~Feel free to make and sell these, but please do not mass produce! If you would like to share this pattern, please link to this page, but do not reprint it on your site. Also, please credit me when using this pattern by tagging me @cutiepie_crochet on Instagram. Thanks, and have lots of fun making your new plushie friend!~
Disclosure: This post contains affiliate links, meaning I get a commission if you decide to make a purchase through my links, at no extra cost to you.
Materials Needed:
3.25mm crochet hook (3.75mm also works!)
Worsted weight yarn in the colors of your choice.
12mm safety eyes (optional, you can also embroider the eyes instead)
Fiber fill
Pins
Abbreviations:
mr- magic ring
sc - single crochet
inc- increase
dec- decrease
st- stitch
FLO- sc in front loops only
dc- double crochet
hdc- half double crochet
ss- slip stitch
Arms (x2):
In main color. Make sure to stuff lightly as you go, stopping around round 18.
Round 1: mr 6 sc [6]
Round 2: sc inc x6 [12]
Rounds 3-5: (3 rounds) sc around [12]
Round 6: sc 3, bobble stitch, sc 8 [12]
Round 7: (sc 2, dec)x3 [9]
Round 8-21: (14 rounds) sc around [9]
Round 22: dec, sc 7 [8]
Pinch opening closed, so that the bobble st is on the outside edge (1st pic), and if your last st is not on either edge (2nd pic), sc one or two st until it is.
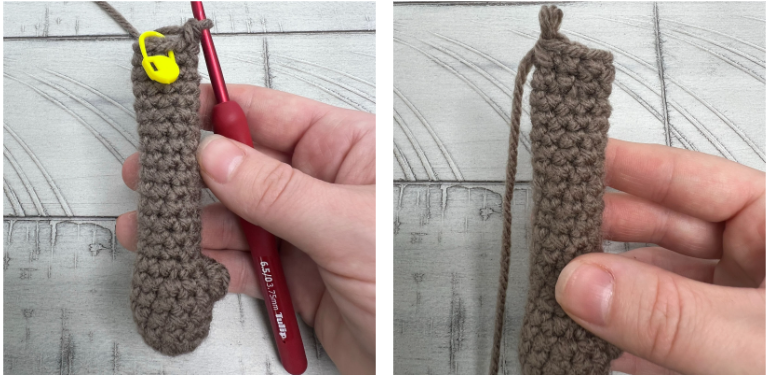
-Sc the opening in half.

Tie off, only leaving a long tail if you intend to attach with sewing instead of crocheting.
Legs (x2):
Start in accent color. Make sure to stuff as you go, stopping around round 19.
Round 1: ch 4
Round 2: starting in 2nd chain from hook, sc 3, flip work and sc 3 into the other side [6]

Round 3: inc x6 [12]
Round 4: (sc 1, inc)x6 [18]
switch to main color
Round 5: in the back loops only, sc around [18]
Round 6: sc around [18]
Round 7: sc 5, dec x4, sc 5 [14]
Round 8: sc 5, dec x2, sc 5 [12]
Rounds 9-22: (14 rounds) sc around [12]
Like the arms, make sure your last stitch is on an outside edge running (perpendicular to the foot), for me this was two st. Then pinch flat and sc in half. [6]

Tie off, only leaving a long tail if you intend to attach with sewing instead of crocheting.
Head/ Body:
In main color.
Round 1: mr 6 sc [6]
Round 2: inc x6 [12]
Round 3: (sc 1, inc)x6 [18]
Round 4: sc 1, inc, (sc 2, inc)x5, sc 1 [24]
Round 5: (sc 3, inc)x6 [30]
Round 6: sc 2, inc, (sc 4, inc)x5, sc 2 [36]
Round 7: (sc 5, inc)x6 [42]
Round 8: sc 3, inc, (sc 6, inc)x5, sc 3 [48]
Rounds 9-16: (8 rounds) sc around [48]
Round 17: sc 3, dec, (sc 6, dec)x5, sc 3 [42]
Round 18: (sc 5, dec)x6 [36]
Round 19: sc 2, dec, (sc 4, dec)x5, sc 2 [30]
Round 20: (sc 3, dec)x6 [24]
Round 21: sc 1, dec, (sc 2, dec)x5, sc 1 [18]
Round 22: stuff head firmly and then FLO sc around [18]
Round 23: sc 3, attach the first arm by sc through both loops of next 4 st of arm and body (make sure bobble st is facing to the left), sc 5, sc next 4 st through other arm (make sure bobble st is facing to the right), sc 2 [18]
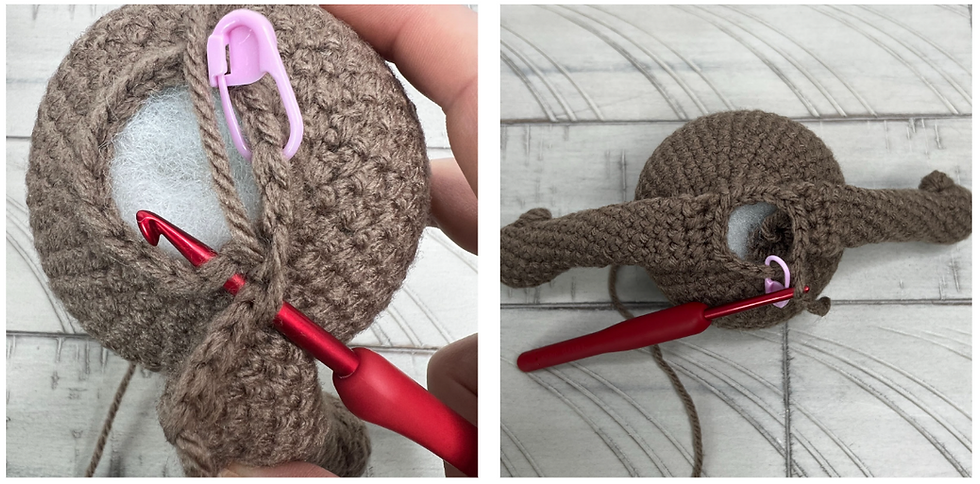
Round 24: sc 1, inc, (sc 2, inc)x5, sc 1 [24]
Round 25-27: (3 rounds) sc around [24]
Round 28: (sc 3, inc)x6 [30]
Rounds 29-32: (4 rounds) sc around [30]
Round 33: sc 2, inc, (sc 4, inc)x5, sc 2 [36]
Rounds 34-41: (8 rounds) sc around [36]
Round 42: sc 16, sc 6 through legs (make sure the toe part of the foot is pointed toward the body), sc 4, sc 6 through legs, sc 4 [36]
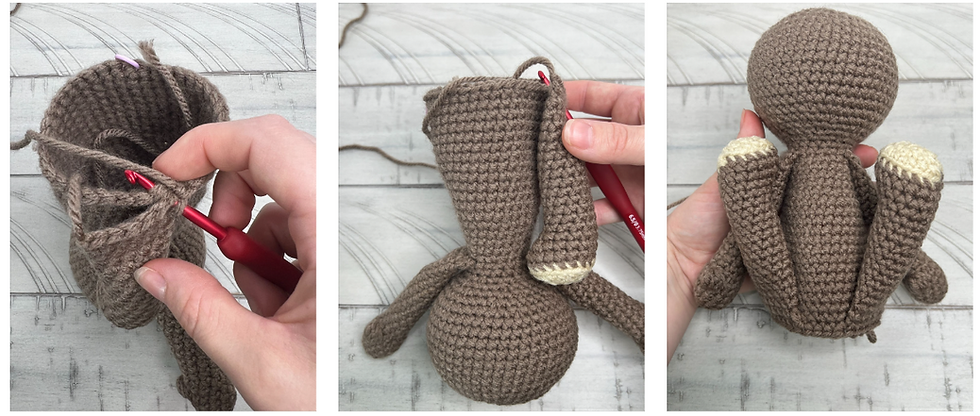
You may need to adjust where the feet go based on how you crochet. The outer edge of the leg should line up with the arms like this:
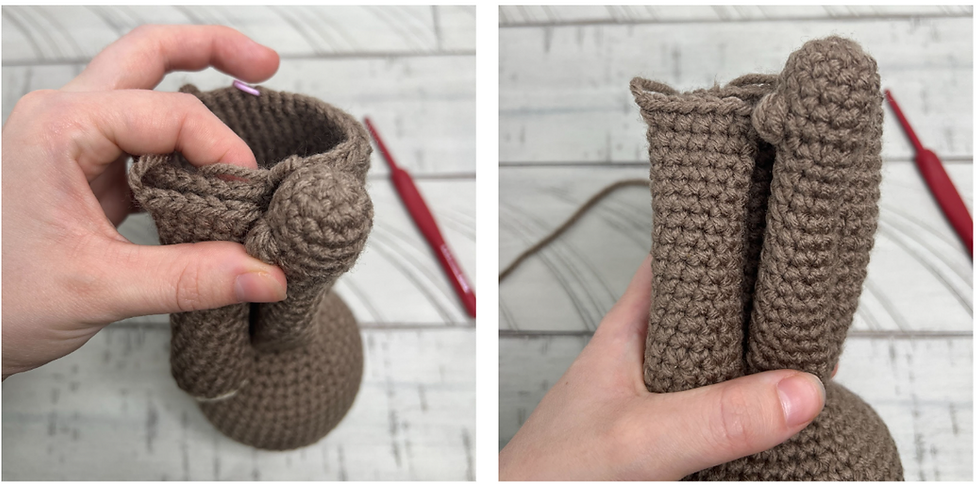
Continue to stuff the body as you finish up the piece.
Round 43: sc 2, dec, (sc 4, dec)x5, sc 2 [30]
Round 44: (sc 3, dec)x6 [24]
Round 45: sc 1, dec, (sc 2, dec)x5, sc 1 [18]
Round 46: (sc 1, dec)x6 [12]
Round 47: dec x6 [6]
Tie off, and weave in tail, closing the hole.
Face:
In accent color.
Round 1: ch 6 [5]
Round 2: starting in 2nd ch from hook, sc 4, inc in last st, flip work and on the other side of ch place sc 4, inc in last st [12]

Round 3: (sc 1, inc)x6 [18]
Round 4: sc 1, inc, (sc 2, inc)x5, sc 1 [24]
Round 5: (sc 3, inc)x6 [30]
Rounds 6-7: (2 rounds) sc around [30]
Round 8: sc 1, FLO, sc 1, hdc 1, dc inc x2, hdc, ss, hdc 1, dc inc x2, hdc 1, sc 1, in both loops sc 18 [34]
Round 9: sc 3, hdc, dc inc x2, hdc, sc, ss, sc, hdc, dc inc x2, hdc, sc ss, tie off, leaving a long tail for sewing. Add safety eyes to the center of each bump or wait until after the face is attached to embroider the eyes.
Tail:
Be sure to stuff lightly as you go.
Round 1: mr 8 sc [8]
Rounds 2-29: (28 rounds) sc around [8]
Fasten off leaving a long tail for sewing.
Ears (x2):
Round 1: mr 6 sc [6]
Round 2: inc x6 [12]
Round 3: (sc 1, inc)x6 [18]
Round 4: sc 1, inc, (sc 2, inc)x5, sc 1 [24]
Rounds 5-6: (2 rounds) sc around [24]
Round 7: sc 1, dec, (sc 2, dec)x5, sc 1 [18]
Fasten off, leaving a long tail for sewing.
Assembly:
Pin the face to the head, making sure to make it as centered as possible and then sew it down, stuffing the snout part as you go. Embroider eyes now if doing so. You can also embroider a mouth and nose on the snout if you’d like for more personalization!

Attach the ears to either side of the head. To find the right position, I like to pin the ears and move them until I am happy with how they look. Each plushie is slightly different, so put them where you think it's the cutest! <3

Lastly, pin the tail so that it helps the monkey to sit on its own and then sew it down. If you would like the tail to curve a bit, here’s how I accomplish that- I take the remaining tail of yarn and weave it in a straight line from the base of the tail to the tip of the tail and then pull until it’s as curved as I want it to be, then I tie it down and hide the yarn!
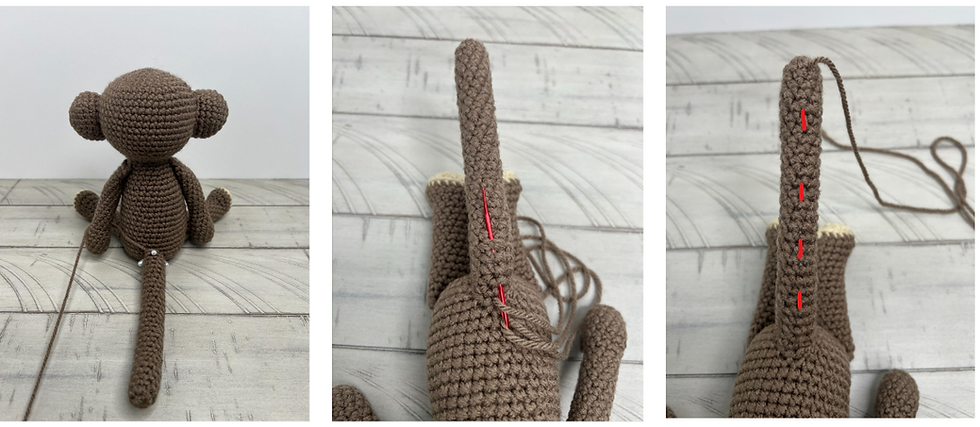
Then you’re all done!
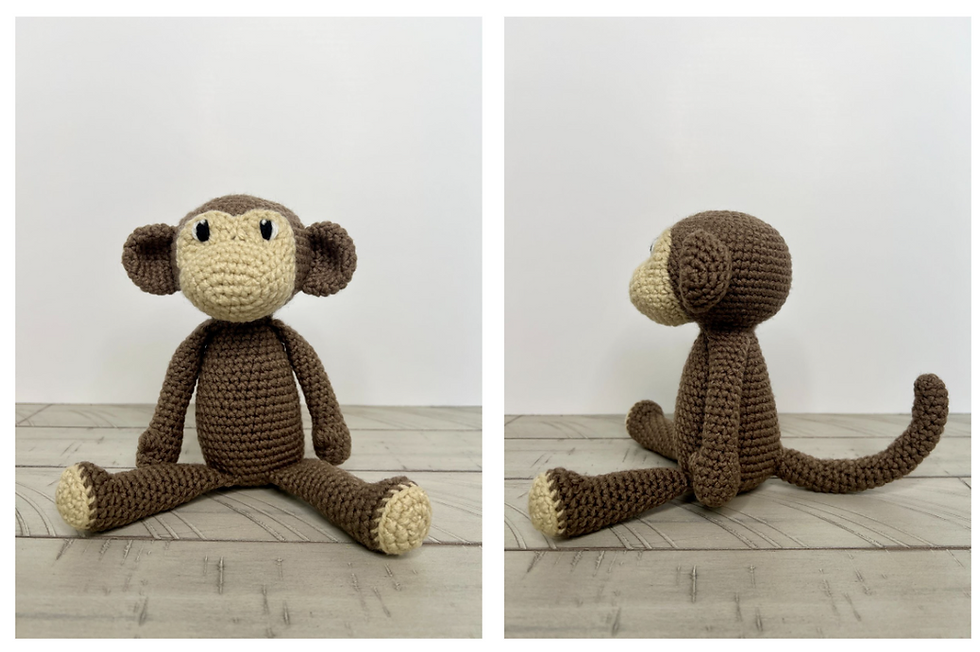
I really hope you enjoy making your new plushie! If you have any questions, please feel free to reach out to me on Instagram or email so I can help you out! And if you do end up making a plushie, please tag me on Instagram (@cutipie_crochet) so I can see your beautiful creations! It brings me so much joy to see all of your cute plushies!
I'll see you next time friends!
Stay safe and healthy! Happy crocheting!!
-Austen (Cutiepie Crochet)
If you enjoyed this pattern and can spare a dollar or two, please consider donating to my Ko-Fi! Your donations help pay for blog fees and help me keep making free patterns!
.png)


