.png)
Sparkles the Baby Clown
- May 9, 2025
- 7 min read
Updated: Jul 11, 2025
I am so excited to share today's free pattern with you all! Sparkles the Baby Clown is a beginner/intermediate pattern that makes an 8.5in tall plush when using worsted weight yarn and a 3.25mm hook.
***You can purchase an INEXPENSIVE AD-FREE PDF of this pattern on Etsy! The pattern is concise, downloadable, and printable and your purchase helps me to continue putting out free patterns!***
Sparkles the Baby Clown's pattern was so fun for me to write. The idea for it kind of started with the desire to turn my irrational fear of clowns into something cute that I would actually want to keep around. I feel like my creative experiment was a success. I have a finished clown that I can proudly display on a shelf without any creepy clown vibes surrounding it!
This pattern is somewhere in between beginner and intermediate levels. While most of the crocheting is pretty straightforward, simple stitches, there is quite a bit of sewing to be done, which I understand is not always beginner-friendly. A small tip before we begin on today's pattern, I really recommend making sure you have sewing pins or something similar (even toothpicks might work if that's all you have). Pinning each piece is exactly where you want it to be before sewing down is such an important step in the assembly process, and it cuts down on quite a bit of stress.

~Feel free to make and sell these, but please do not mass produce! If you would like to share this pattern, please link to this page, but do not reprint it on your site. Also, please credit me when using this pattern by tagging me @cutiepie_crochet on Instagram. Thanks, and have lots of fun making your new plushie friend!~
Disclosure: This post contains affiliate links, meaning I get a commission if you decide to make a purchase through my links, at no extra cost to you.
Materials Needed:
3.25mm crochet hook (3.75mm also works!)
Worsted weight yarn in the colors of your choice. You can use whatever colors you want, but for the instructions, I marked the five colors I used: blue, pink, purple, white, and yellow.
Fiber fill
Pins
Abbreviations:
mr- magic ring
st- stitch
sc- single crochet
inc- increase
dec- decrease
ch- chain
Head:
In white
Round 1: mr 6 sc [6]
Round 2: inc x6 [12]
Round 3: (sc 1, inc)x6 [18]
Round 4: sc 1, inc, (sc 2, inc)x5, sc 1 [24]
Round 5: (sc 3, inc)x6 [30]
Round 6: sc 2, inc, (sc 4, inc)x5, sc 2 [36]
Round 7: (sc 5, inc)x6 [42]
Round 8: sc 3, inc (sc 6, inc)x5, sc 3 [48]
Rounds 9-16: (8 rounds) sc around [48]
Round 17: sc 3, dec, (sc 6, dec)x5, sc 3 [42]
Round 18: (sc 5, dec)x6 [36]
Round 19: sc 2, dec, (sc 4, dec)x5, sc 2 [30]
Round 20: (sc 3, dec)x6 [24]
Round 21: sc 1, dec, (sc 2, dec)x5, sc 1 [18]
Tie off, stuff firmly, and hide the tail.
Ears (make 2):

In white
Row 1: mr 3 sc [3]
Row 2: ch 1, turn work, inc x3 [6]
Tie off, leave a long tail for sewing, weave in mr tail. (Pictured —>)
Arms (make 2):
Start in white.
Round 1: mr 6 sc [6]
Round 2: inc x6 [12]
Round 3: (sc 2, inc)x4 [16]
Rounds 4-5: (2 rounds) sc around [16]
Round 6: sc 5, dec 2, sc 7 [14]
Round 7: sc 4, dec 2, sc 6 [12]
Switch to yellow.
Rounds 8-23: (16 rounds) sc around [12]
Stuff only ¾ of the arm. Pinch the opening shut and sc across to close (pictured below). Tie off, leave a long tail if you plan on sewing the arms on, or a short tail if you plan on crocheting to attach them later.

Legs (make 2, don’t tie off the 2nd):
Start in white.
Round 1: mr 6 sc [6]
Round 2: inc x6 [12]
Round 3: (sc 1, inc)x6 [18]
Rounds 4-5: (2 rounds) sc around [18]
Switch to yellow.
Round 6: sc around [18]
Tie off the first leg, but not the second.
Body:
Continue in yellow. Stuff the body as you go.
Round 7: ch 3, place sc into 1st leg, sc around, place 3 sc along ch, sc around 2nd leg, place 3 sc across ch. Both legs are now one continuous round. [42]

Rounds 8- 15: (8 rounds) sc around [42]
Round 16: sc 9, dec, sc 19, dec, sc 10 [40]
Round 17: sc 18, dec, sc 18, dec [38]
Round 18: sc 9, dec, sc 17, dec, sc 8 [36]
Round 19: sc 17, dec, sc 15, dec [34]
Round 20: sc 7, dec, sc 15, dec, sc 8 [32]
Round 21: sc 15, dec, sc 13, dec [30]
Round 22: sc 6, dec, sc 14, dec, sc 6 [28]
Round 23: sc 15, dec, sc 9, dec [26]
Round 24: sc 7, dec, sc 11, dec, sc 4 [24]
Round 25: sc 1, dec, sc 11, dec, sc 8 [22]
Round 26: sc 6, dec, sc 9, dec, sc 3 [20]
Round 27: sc 3, dec, sc 8, dec, sc 5 [18]
Round 28: sc around, attach both arms sides of the body by sc through both loops of the arm and body (pictured below). This placement can be different for every individual based on crochet technique and tension. If you’d prefer, you can also skip this part and sew the arms on later. [18]

Round 29: sc around [18]
Tie off, leaving a long tail for sewing. Stuff to medium firmness.
Hair Cap:
If you’re making the cap in a single color, ignore the instructions to change color. I’m going to refer to the colors as “P” and “B” for ease of reading. So when you see that, change colors. I find it helpful to carry the opposite color yarn behind my working yarn so that I don’t have a bunch of loose ends to deal with, but do whatever you’re comfortable with.
Round 1: mr 6 sc (3 P, 3 B) [6]
Round 2: inc x3 P, inc x 3 B [12]
Round 3: (sc 1, inc)x3 P, (sc 1, inc)x3 B [18]
Round 4: (sc 2, inc)x3 P, (sc 2, inc)x3 B [24]
Round 5: (sc 3, inc)x3 P, (sc 3, inc)x3 B [30]
Round 6: (sc 4, inc)x3 P, (sc 4, inc)x3 B [36]
Round 7: (sc 5, inc)x3 P, (sc 5, inc)x3 B [42]
Round 8: (sc 6, inc)x3 P, (sc 6, inc)x3 B [48]
Rounds 9-10: (2 rounds) sc 24 P, sc 24 B [48]
Round 11: sc 16 P, 16 fringe pieces (directions on next page), sc 16 B [48]
To make fringe pieces: (ss into next st, ch 5, in 2nd ch from hook, ss down ch) repeat. Make 8 pink strands and 8 blue

Tie off, leaving long tails for sewing.
Buns (make 2):
I made my buns in two different colors but you do not have to
Round 1: mr 6 sc [6]
Round 2: inc x6 [12]
Round 3: (sc 1, inc)x6 [18]
Round 4: sc 1, inc, (sc 2, inc)x5, sc 1 [24]
Round 5: (sc 3, inc)x6 [30]
Rounds 6-10: (5 rounds) sc around [30]
Round 11: (sc 3, dec)x6 [24]
Tie off, leaving a long tail for sewing. Stuff to medium firmness.
Ruff:
In lavender
ch 21
Row 1: in 2nd ch from hook, sc in every ch space, ch 1 and turn [20]
Row 2: place 3 sc in every st [60]
Tie off, leaving a long tail for sewing.
Nose:
In lavender
Round 1: mr 6 sc [6]
Round 2: sc around [6]
Tie off, leave a long tail for sewing.
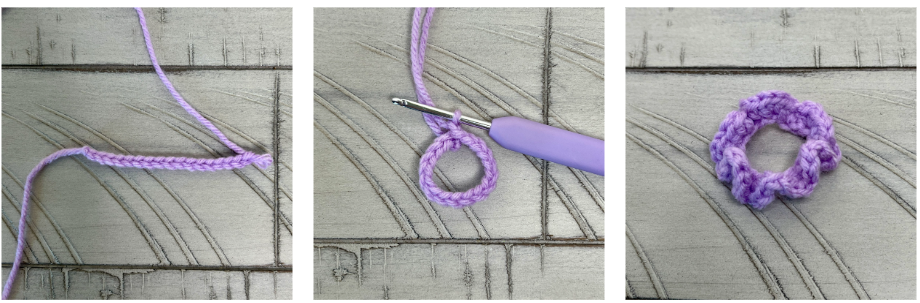
Arm Cuffs (make 2):
In lavender
ch 17
Round 1: ss into first ch st to make a ring, and ch 1, place 3 sc into every ch space around, ss into 1st st. [48]
Tie off and weave in ends. Leave a long tail if you intend on sewing them down.
Buttons (make 2):
In blue
Round 1: mr 8 sc [8]
Tie off, leaving a long tail for sewing.
Assembly:
Start by attaching the head to the body, stuffing the neck as you go so that the head isn’t floppy (unless you want it to be!)
Sew on the hair cap, taking care to line it up so that the color change is right down the middle of the head. I like to use a long piece of yarn to mark out the middle of the head and body to make lining everything up a bit easier.

Attach the buns on either side of the hair cap, I like to try and get them as centered to each color as possible, but you can put the buns wherever you think is cutest. Make sure your buns are stuffed before you completely sew them down.

Then it’s time to add all the small bits. I do not sew on the arm cuffs because I like to be able to remove them, but you totally can if you want! I don’t have any specific points where I attach these pieces. I just pin them until I’m happy with the look and then I sew them down.

Lastly, I like to embroider the eyes and add any other accessories to make my clown unique.
To embroider eyes, I mark out where I want the eyes with pins and then I start with black. I make a small diagonal line first, and then back stitch 3-4 times in the same spaces for the pupil, and then I add the color, backstitching 2-3 times.

And then you are all finished! I hope you had so much fun making your own baby clown!

I really hope you enjoy making your new plushie! If you have any questions, please feel free to reach out to me on Instagram or email so I can help you out! And if you do end up making a plushie, please tag me on Instagram (@cutipie_crochet) so I can see your beautiful creations! It brings me so much joy to see all of your cute plushies!
I'll see you next time friends!
Stay safe and healthy! Happy crocheting!!
-Austen (Cutiepie Crochet)
If you enjoyed this pattern and can spare a dollar or two, please consider donating to my Ko-Fi! Your donations help pay for blog fees and help me keep making free patterns!


